There’s a quiet frustration in watching solder ball up on a pad and refuse to wet—a problem I ran into far too often when I started. Soldering a wire to a circuit board taught me that prep and heat control matter just as much as a steady hand. It’s a small sequence that, done right, gives you a joint that lasts years. Below I’ll walk through what I’ve learned on the bench—not just the steps, but the stuff that actually prevents rework.
Gear That Won’t Fight You
You don’t need a lab, but a few sensible tools make the difference. A temperature-controlled iron with a fine tip lets you set soldering iron temperature to 300–400°C. Pair it with rosin-core solder (0.5–1 mm diameter), and you’ll spend less time fighting oxidation. Keep safety glasses on—hot flux spatter is more common than people admit—and have tweezers, wire cutters, and isopropyl alcohol within reach.
The Prep Step Most People Skip
This is where I see beginners lose the battle before they even heat the iron. Start by cutting your wire to length, strip about 6–12 mm of insulation, and spend a minute on pre-tinning wires. Melt a little solder onto the exposed strands so they’re fully wetted; it takes seconds and makes the actual joint much easier. On the board side, wipe the pads and through-holes with alcohol—grease and oxidation are the enemy of good adhesion. Application of Solder Paste in SMT shares similar prep principles that translate to hand soldering work.
Making the Solder Flow—And Judging the Joint
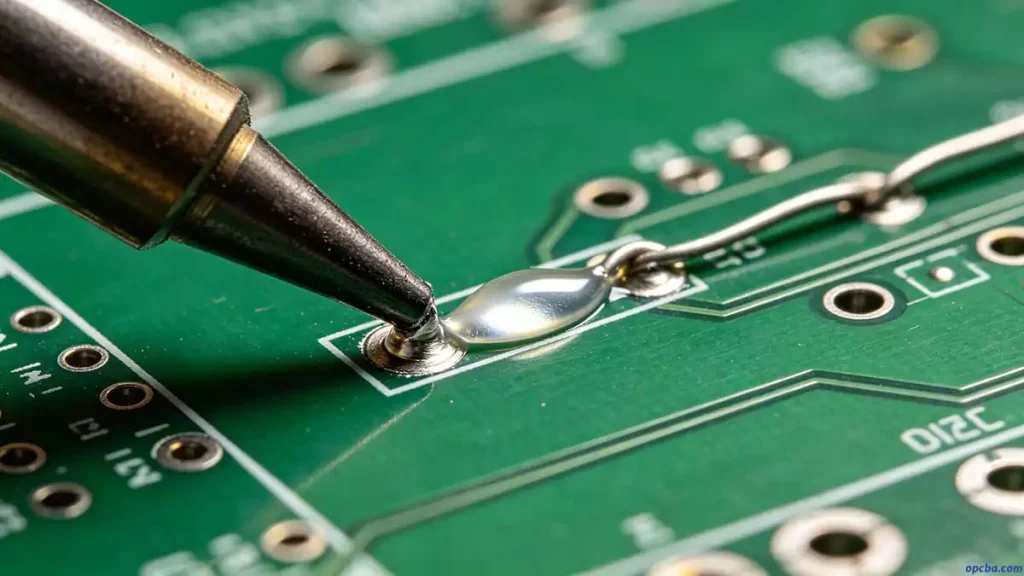
Insert the wire through the hole and bend the lead slightly underneath to hold it steady. Now place the tinned iron tip so it touches both the pad and the wire. Let them heat together for about two seconds, then feed solder into the joint (not onto the iron tip). When the solder wicks around the wire and forms a small, concave fillet, you’re done. Remove the iron and hold still while it solidifies.
A good joint looks shiny and smooth. If it’s dull, grainy, or shaped like a ball, you’ve probably got a cold solder joint. That typically means the pad or wire didn’t get hot enough, or the iron was pulled away before the solder set. Reheat the connection and, if needed, add a tiny bit of flux to help it flow.
When It Goes Wrong: Quick Fixes
If you keep getting cold solder joint issues, double-check your soldering iron temperature—a tip that’s too cool or doesn’t recover fast can cause endless frustration. Oxidised wires are another culprit; if pre-tinning didn’t take well, trim and re-strip. And never try to “add just a little more solder” on top of a failed joint; remove the old solder with wick, clean, and start fresh. A solid soldering a wire to a circuit board connection is worth the extra minute.
Safety Notes (That I Actually Follow)
Work with some airflow—open a window or use a small fan to pull fumes away. Those safety glasses? Keep them on even for “quick touch-ups.” I learned that lesson after a tiny solder ball flew into my eyebrow. Having a soldering stand also stops you from setting the iron down on something flammable.
With a bit of practice, soldering a wire to a circuit board becomes second nature. Remember: clean surfaces, proper pre-tinning wires, and enough heat. Once you’ve nailed a few joints, you’ll start recognizing a good one by sound and sight.


